
Documentation
Using this program is pretty easy. Here's what you need to know.
INSTALLATION
Download the program and then run it. Accepting the defaults is all you need to do unless you want to install it to a different folder. Live Picture Show is built by Carbon Creatures and Infusion Software. If you see that the program was signed by Infusion, that's us.
GETTING STARTED
After installation, open the program.
Each time you use this you will want to set the folder for LPS to monitor. You can do this by going to File -> Open Active Folder, or by hitting CTRL-O ("O" for Open). Select the folder on your computer that you wish to monitor.
Set your camera's sync software to copy files to this folder as you shoot them on your camera. You will also need to connect your camera to your computer via USB cable or wifi. We do not provide this functionality as it will vary from camera to camera. There are some existing and free solutions out there if you don't have something from your camera manufacturer. Live Picture Show is designed to work in conjunction with a process like this, not to provide it. Our software only looks for jpg and png files so it's okay if your software also syncs RAW files, we'll just ignore those.
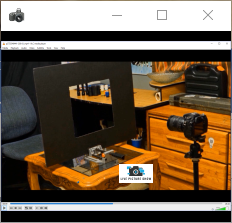
When Live Picture Show launches you will see two windows. One will have all of the controls and the other will start as a small windows and its only purpose is to display images. Most of the time when you are using LPS you will have two screens, one to control things and the other to display on. Often the control screen is on a laptop and the display screen is a large external monitor or projection system.
Drag the viewer window to your display monitor. Double-clicking in the window will make it go full screen and this is
probably what you want. You can go full screen on a single-screen setup as well but you won't be able to use any of the controls
if you do.
As you take pictures and they are copied into the folder that you are monitoring they will join your live picture show! Side note: while this was designed to work from a camera it doesn't really care where the images come from. If you capture images via a webcam, or some other source like a program generating them on its own, that's fine too. All that is required is that there are images in a folder and the appeal of this program is managing the display as new images get added.
SETTINGS
To access settings to the top menu and choose Options -> Settings. Here is what you'll find:
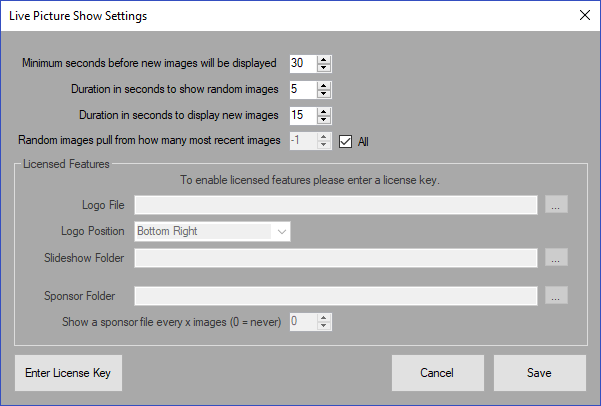
Minimum seconds before new images will be displayed - This is the number of seconds it will take for an image to possibly be displayed after it is taken. This is here to let you take pictures of people in your photo booth, then let them walk out of the booth the viewing area and have their pictures waiting for them. If you are taking conventional photos then you might set this to 30-60 seconds. If you are doing long exposure images you might want to make this a little longer.
Duration in seconds to show random images - When new images aren't being shown then the system will display random images from the same folder. This setting lets you choose how long each random image will be shown, in seconds.
Duration in seconds to display new images - New images will move into the "Up Next" queue. They won't be shown immediately, as you probably set some sort of delay per the earlier setting, but once they make it to the screen this setting, in seconds, will dictate how long they will be shown.
Random images pull from how many most recent images - If you are running a busy photo booth you might want more recent pictures to fill the space between new pictures. This would let people hanging out, having just shot with you, to be able to see their pictures again quickly. If you set this to 'all' then it will draw from the entire folder. If you set this to a number then only that many most recent pictures will be pulled into the random feed.
Changing these settings will not impact the slide that is being displayed. All changes take effect upon the next picture load after you hit save.
ADDITIONAL SETTINGS (LICENSED MODE)
Although the program is free there are a few more settings available with a paid license. These allow you to choose your
own logo, and to manage sponsor slides. You will be able to see these settings without a license but you need a license
to access them.
Logo file path - this is where you can select your own logo file to use. Supported file types are jpg and png files. You can use transparency with png files. Most of the time you will anchor the logo to particular part of the image, but you can also choose to do a full screen overlay that would let you position multiple logos in various corners or parts of the screen.
Logo Position - choose where the logo shows up. Top left, top, top right, left, center, right, bottom left, bottom, bottom right. Your logo will be shown at 100% size. These changes can be visible immediately. You can also choose fullscreen and your logo will be displayed as a best-fit overlay on top of the slideshow imge. You can use this mode if want to have a more complex logo layout (multiple corners for instance). You will need to use a transparent PNG to use this effectively. You need to save your settings in order to change in or out of fullscreen logo mode. If you're doing a full screen logo choose full screen otherwise stuff in corners may not appear as you expect in any other mode.
Slideshow folder - You can choose a second folder that will be used for your source images at any time. The most common use for this is a slideshow of your prior work before you actually start shooting. Use this setting to choose your other slideshow folder. You can easily toggle between live shooting and this folder as described below.
Sponsor Folder - not currently working
Show a Sponsor file every x images - when using a folder with sponsor images this setting will determine how often they are shown. If you set this to zero then no sponsor images will be shown. For any other value, that many pictures will be shown and then a sponsor image will be shown.
MANAGING WHEN TO SHOW LOGOS (LICENSED MODE)
When you set up your logo it will show on all slides unless you explicitly tell it not to. You can do this by adding a file in the same folder with the same filename as the slide with an additional ".nologo" added to the filename. If you don't want a logo on "apple.jpg" then you would make another file called "apple.jpg.nologo".
This is fine if you know in advance that you don't want a logo displayed. However, selecting a file from the folder you will see in the bottom right either "Show Logo" or "No Logo". That indicates the current state of whether an image will show. Clicking it will switch it to the other option. There is a similar button that will apply the same setting to the entire folder.
Sponsor Images - If you make a folder called "sponsors" under the active folder you can put as many sponsor images in there as you'd like. They will be displayed based on the schedule you choose in Settings. If you don't want to have your logo displayed on top of the sponsor logos then you can put a file in that folder simply called "nologo". If you temporarily set your active folder to be the sponsors folder you can also use the button to set that option for the entire folder. Behind the scenes they will both do the same thing.
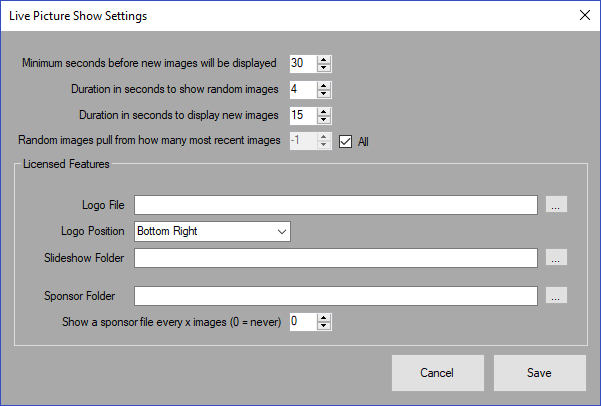
GETTING A LICENSE
Although the program is free there are a few more settings available with a paid license. These allow you to choose your
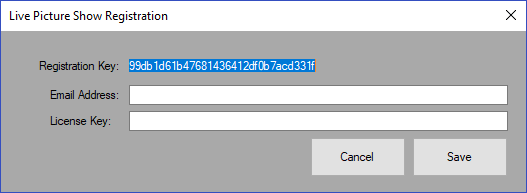
own logo, and to manage sponsor slides. If you go to Options -> Settings you may see an option in the bottom left to
enter a license code. Visit this link to get a license. If you do not see an option to
enter a license then your license has already been applied.
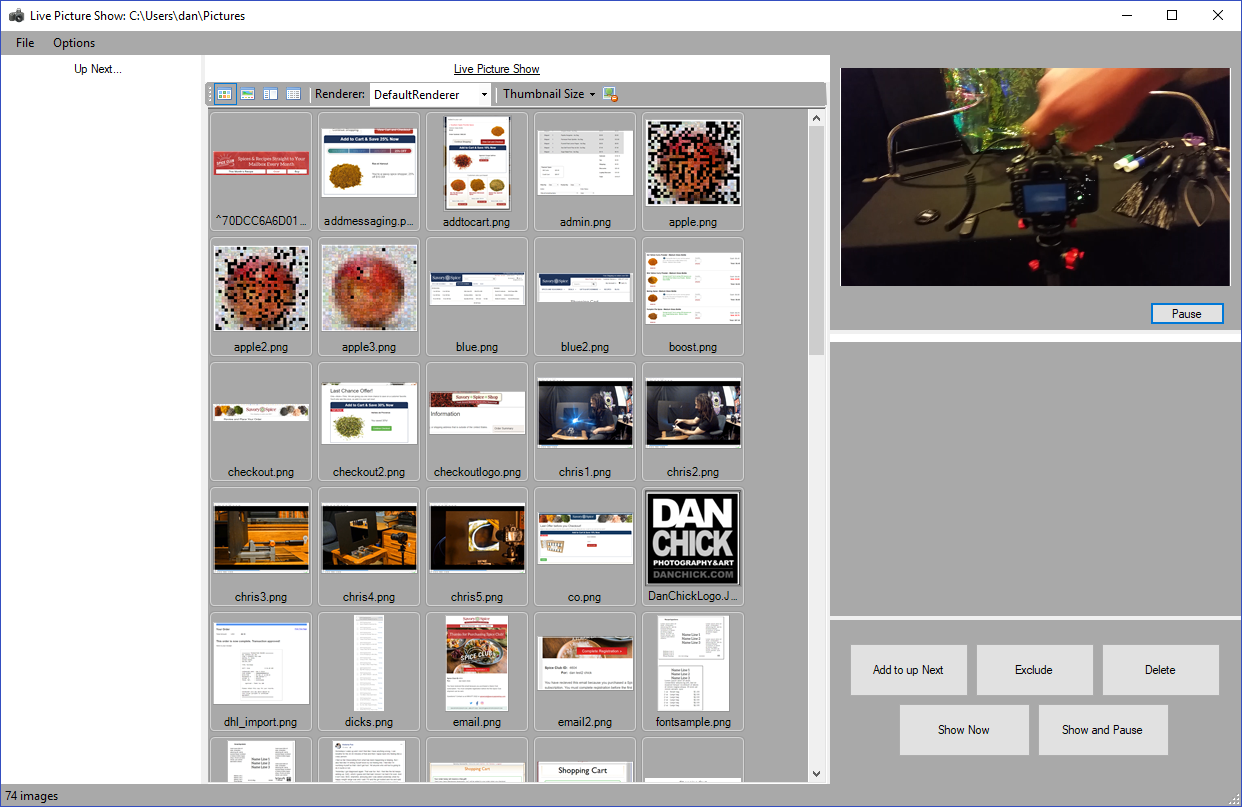
PARTS OF THE PROGRAM
Left Column - Up Next. This is where all of the queued images are displayed. The ones on the top display before the ones below. If an image hasn't hit its delay period (see above in Settings) then it won't yet be displayed.
Center Column - This shows thumbnails of all images in your folder. There are some options at the top that let you choose how the thumbnails are displayed. Play around with those if you'd like but we recommend the view you start with. There is, however, an option in there that lets you change the thumbnail size. You can select an image and it will appear on the right and give you some options.
Right Column - The top image is a mirror of the one currently being displayed. There is also a button that will say either "Pause" or "Start" that you can use to pause or resume your slideshow. If you have selected an image in the center column the the middle image will reflect that. Simply selecting an image won't do anything but you are then presented with options in the bottom right panel.
Add to Up Next - This will add your selected image to the up next queue, to be displayed in the order of the images in the queue. If there is nothing in the queue then this button will make your selected image the next one shown.
Exclude - Did you take a bad picture of someone? Leave the lens cap on? Click this button and it will prevent this image from being displayed for the rest of your picture show. This does not delete the image.
Delete - Was it a REALLY bad picture? Clicking this button will delete the selected image. Be careful with this one.
Show Now - When you click this button it will display your selected image, immediately replacing whatever image was being shown, and bypassing anything in the Up Next queue.
Show Now and Pause - This functions the same as Show Now, but it also pauses the slideshow. Do you need to display a message that you're going to be back in a few minutes? This might be a way to do it and to leave it up.
USING THE PROGRAM
After you have set up your settings and your file sync, actually using the program is really easy. Pictures in your chosen program will cycle randomly. This will either be from your live folder or your pre-determined Slideshow folder. To toggle between these go to Options -> Use Slideshow Folder. That option will not be available if you haven't yet selected a slideshow folder in Settings.
As you shoot images on your camera, and if your sync is working, you will see them appear in the Up Next column. After a brief delay period (determined in your settings) the new image will be displayed. This will repeat for as many images as you have in the Up Next section.
When you no longer have any images in Up Next, or none of the images in Up Next have completed their delay, then the system will show a random image in order to keep the slideshow going. This will be pulled from either the entire folder, or from however many recent images you specified in the settings.
By default images will be shown randomly when there are no fresh images to display. You can make images show alphabetically (if you need to use this program to show images in a specific order for some reason) by going to Options -> Play Mode, and selecting "Filename order". Set that back to "Random" to resume normal usage.
LIGHT PAINTING STUDIO MODE
There is another mode built into this software that will be of use to studio light painting photographers. Access it by going to Options -> Play Mode, and selecting "Light painting".
This will cause the screen to go black. When a new image is added to the folder it will immediately display on the screen. Hitting the space bar will return the screen to black, and the process repeats.
The idea behind this feature is that when you are doing a light painting in a dark studio you don't want to have your monitor emitting light. However when your shot is done you can now preview it on a much larger screen than you have on your camera, and if you are workign with a team it makes it easier to see. If you have a model in focus they might be able to see it too without moving from their location. When you're done checking out the picture you can hit space and you're back in the dark again, ready for the next shot.
Set the mode back to "Random" to resume that mode, or just close the program when you're done your studio session.